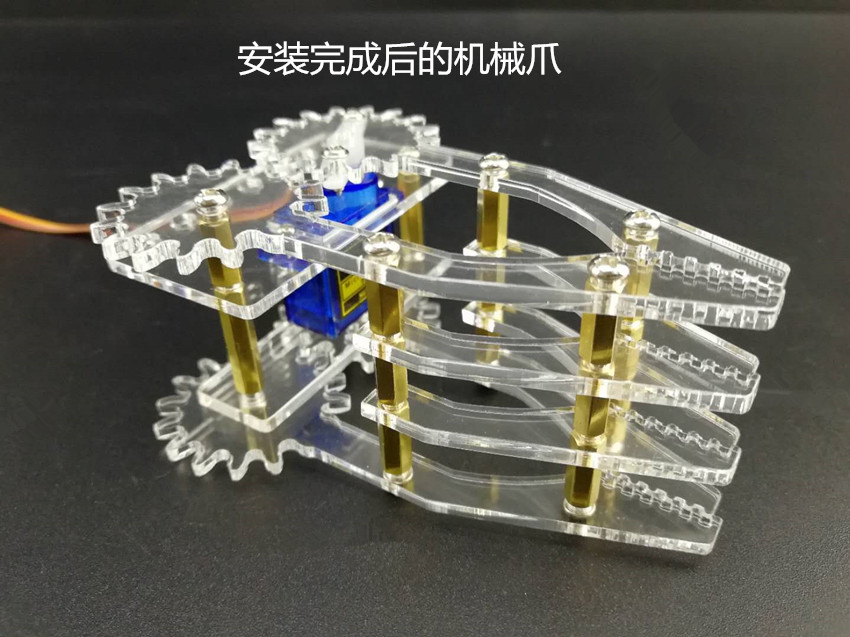
SNM200亚克力爪教程
精品教程 •
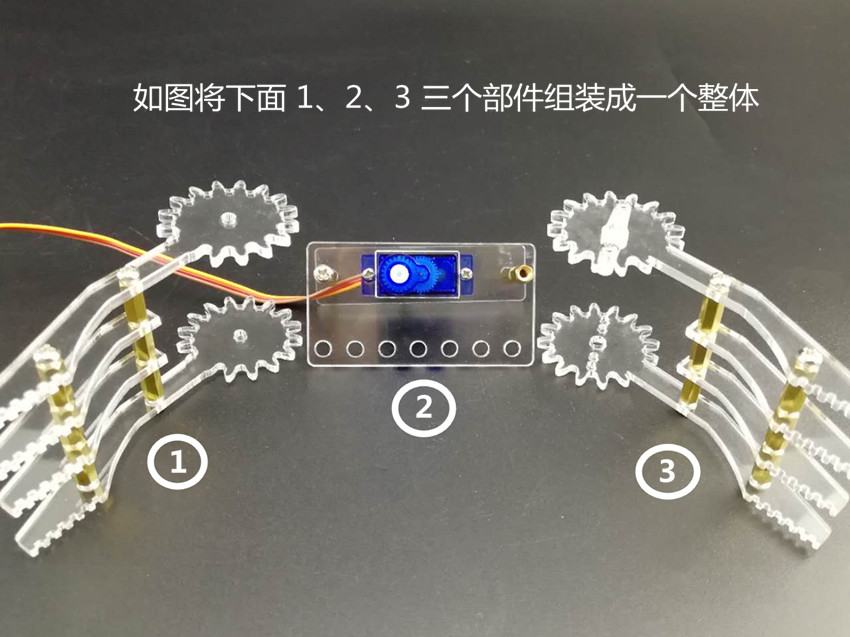
机械爪散件组装图
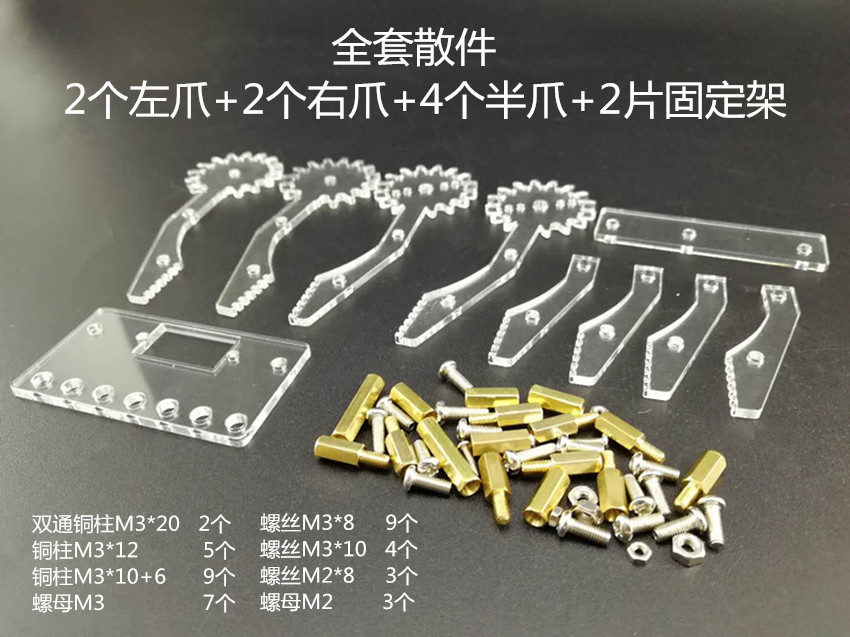

2 left claw +2 right claw +4 half claw +2 plate fixer
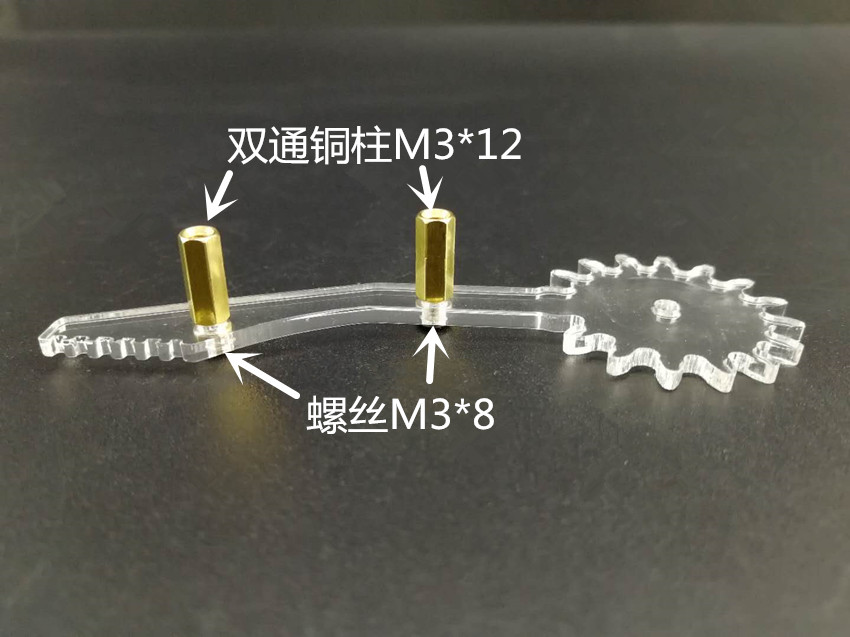
双通铜柱 Double copper column
铜柱 copper pillar
螺母 Nut
螺丝 Screw
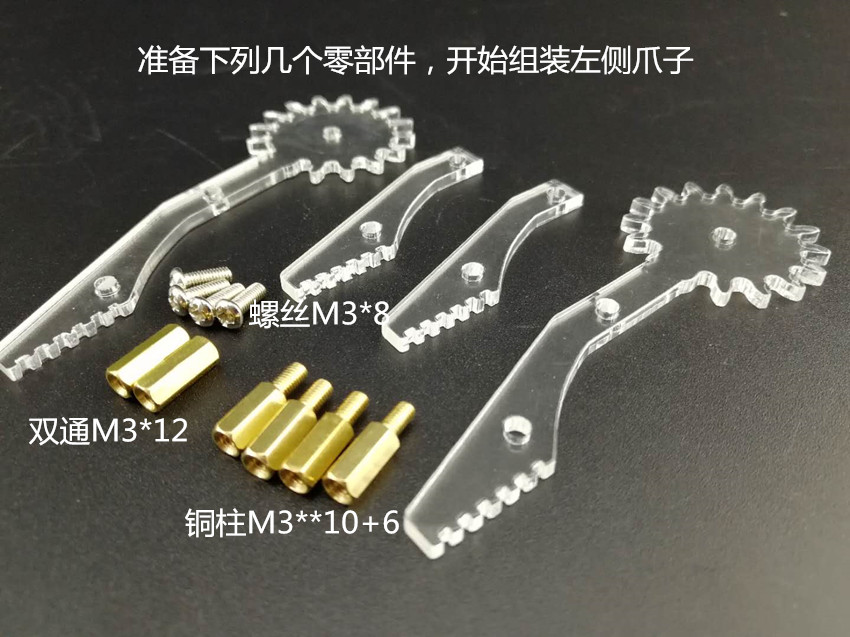
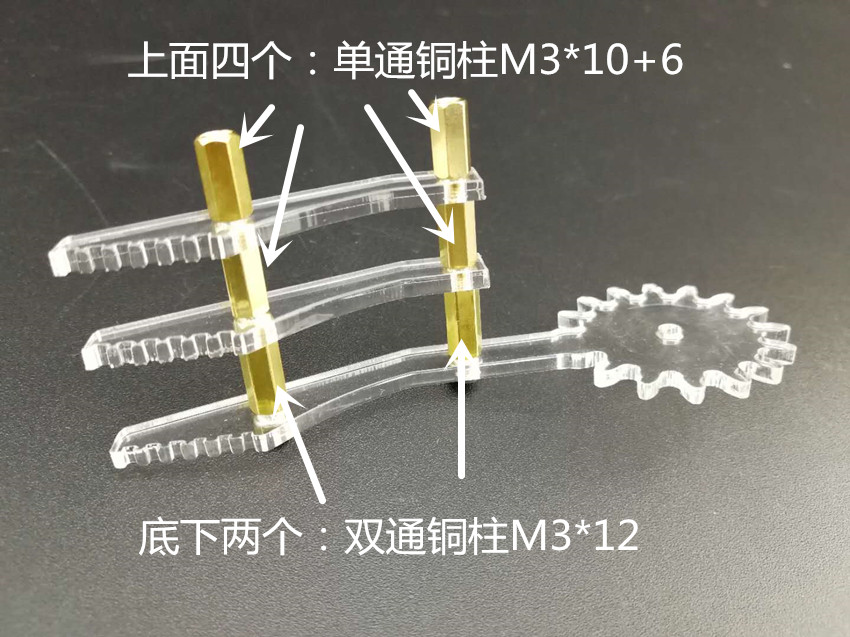
铜柱M3*12 copper pillar M3*12
双通M3*10+6 Double copper column M3*10+6
螺丝M3*8 Screw M3*8
螺丝M3*8 Screw M3*8
The bottom two: double copper column M3*12
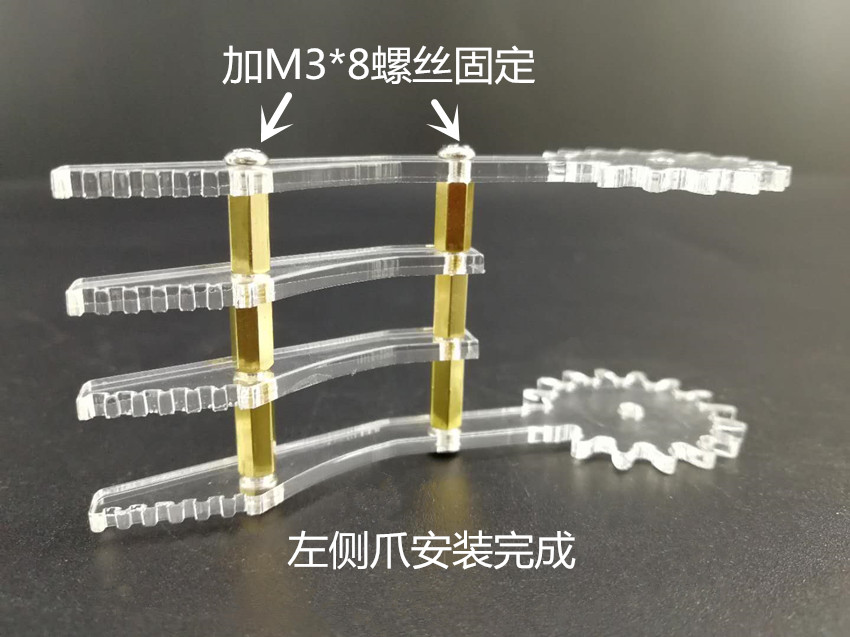
Left claw completion.
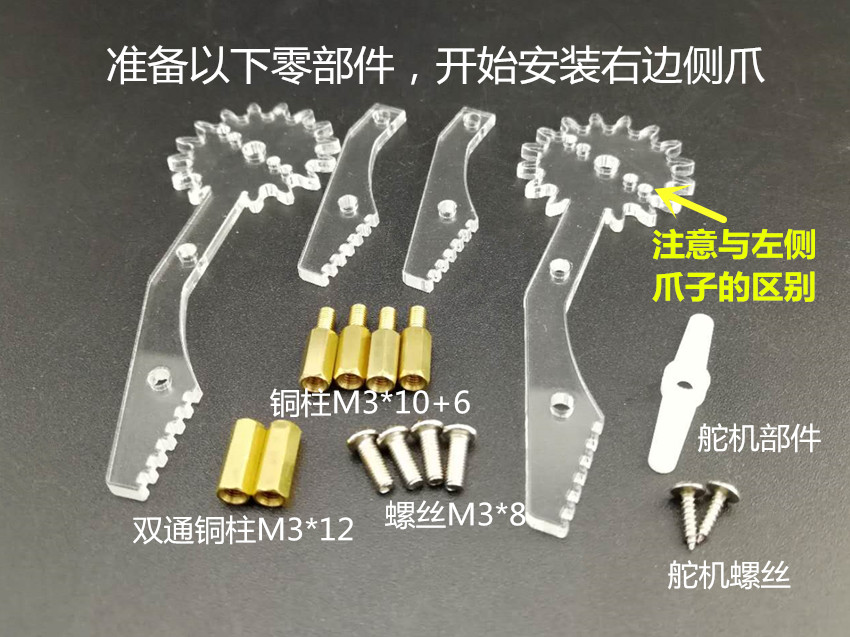
Pay attention to the difference from the left paw.
铜柱M3*10+6 Copper column M3*10+6
双通铜柱M3*12 Double copper column M3*12
螺丝M3*8 Screw M3*8
舵机部件 steering engine parts
舵机螺丝 steering engine screw
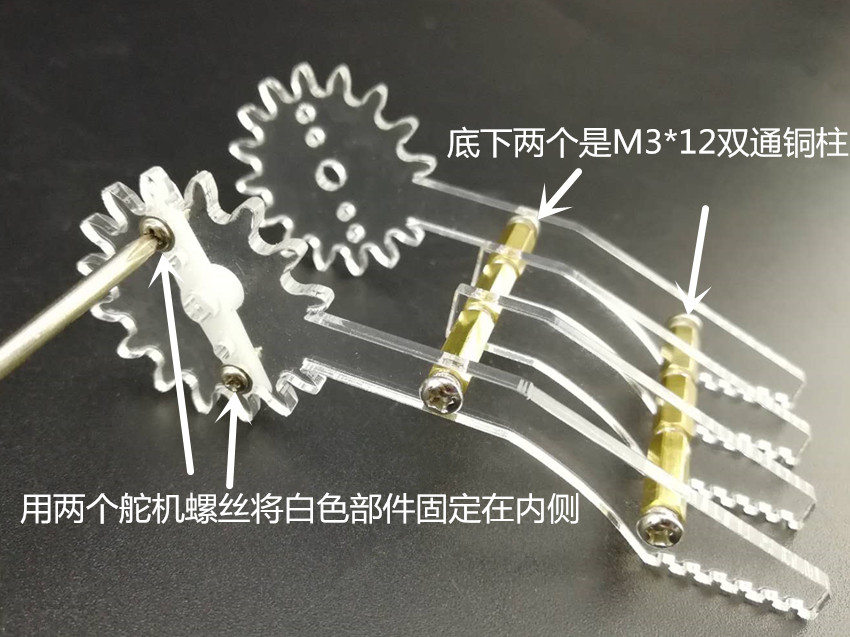
Use two steering screws to fix the white parts in the internal measurement.
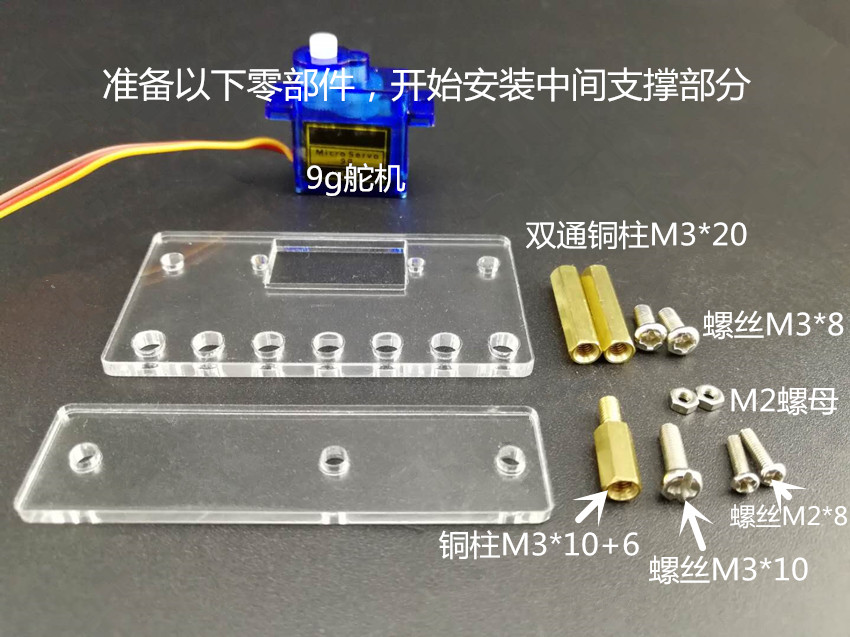
双通铜柱M3*20 Double copper column M3*20
螺丝M3*8 Screw M3*8
M2螺母 M2 nut
螺丝M2*8 Screw M2*8
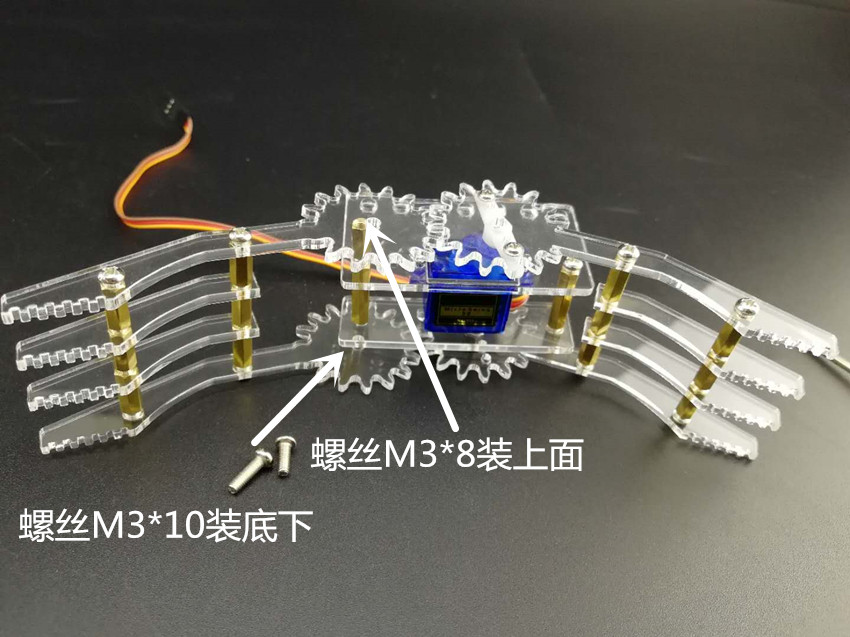
螺丝M3*10 Screw M3*10
铜柱M3*10+6 Copper column M3*10+6
螺丝M3*8 Screw M3*8
螺丝M3*10 Screw M3*10
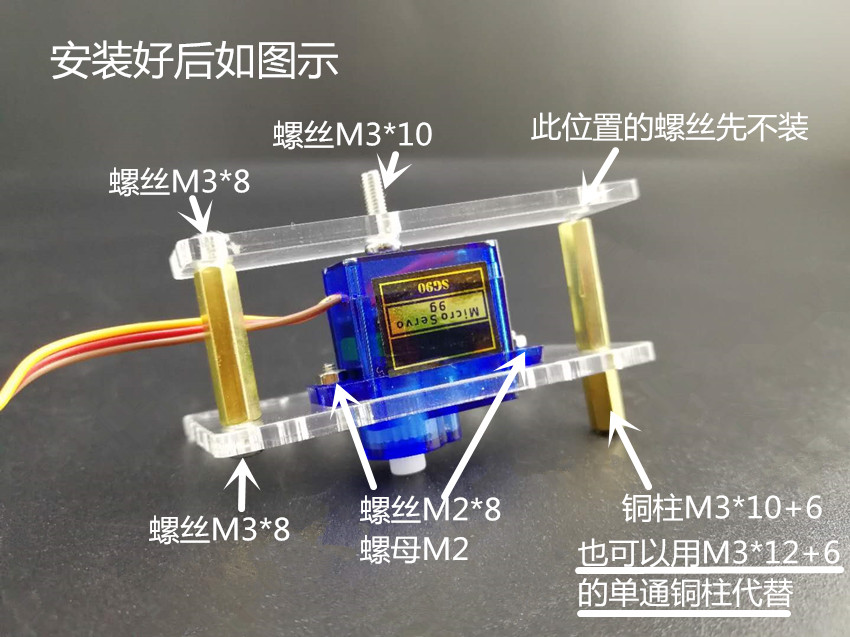
此位置的螺丝先不装
The screws in this position are not installed at first
螺丝M3*8 Screw M3*8
螺丝M2*8 Screw M2*8
螺母M2 nut M2
铜柱M3*10+6 Copper column M3*10+6
Underline: you can also use M3*12+6’s single copper column instead.
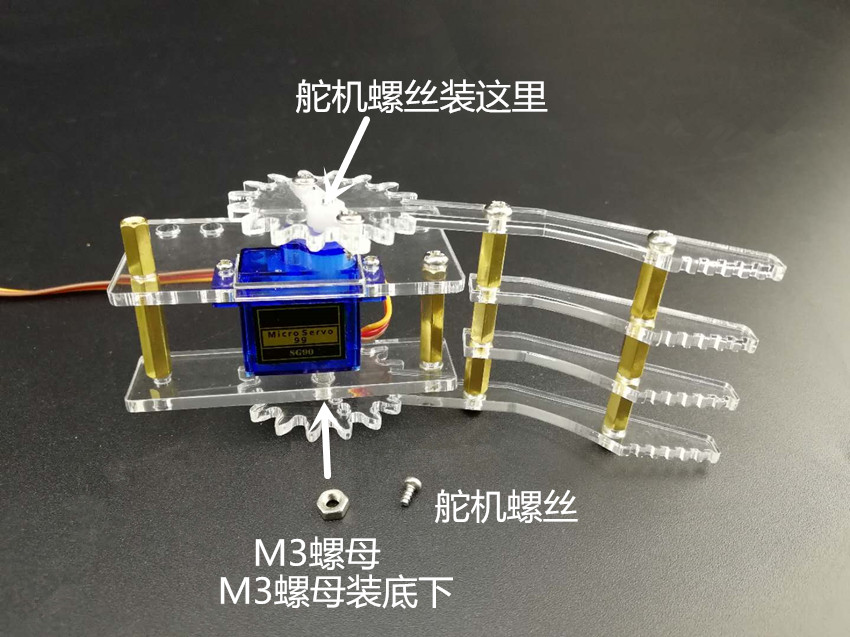
舵机螺丝 steering engine screw
M3螺母 M3 nut
The M3 nut is installed at the bottom.
Screw M3*10 underneath